DIY Hanukkah Menorah Ideas: 15 Easy Crafts to Make
A menorah is the heart of Hanukkah. Families light it for eight nights to remember the Festival of Lights. Making your own menorah can be a fun and meaningful craft.

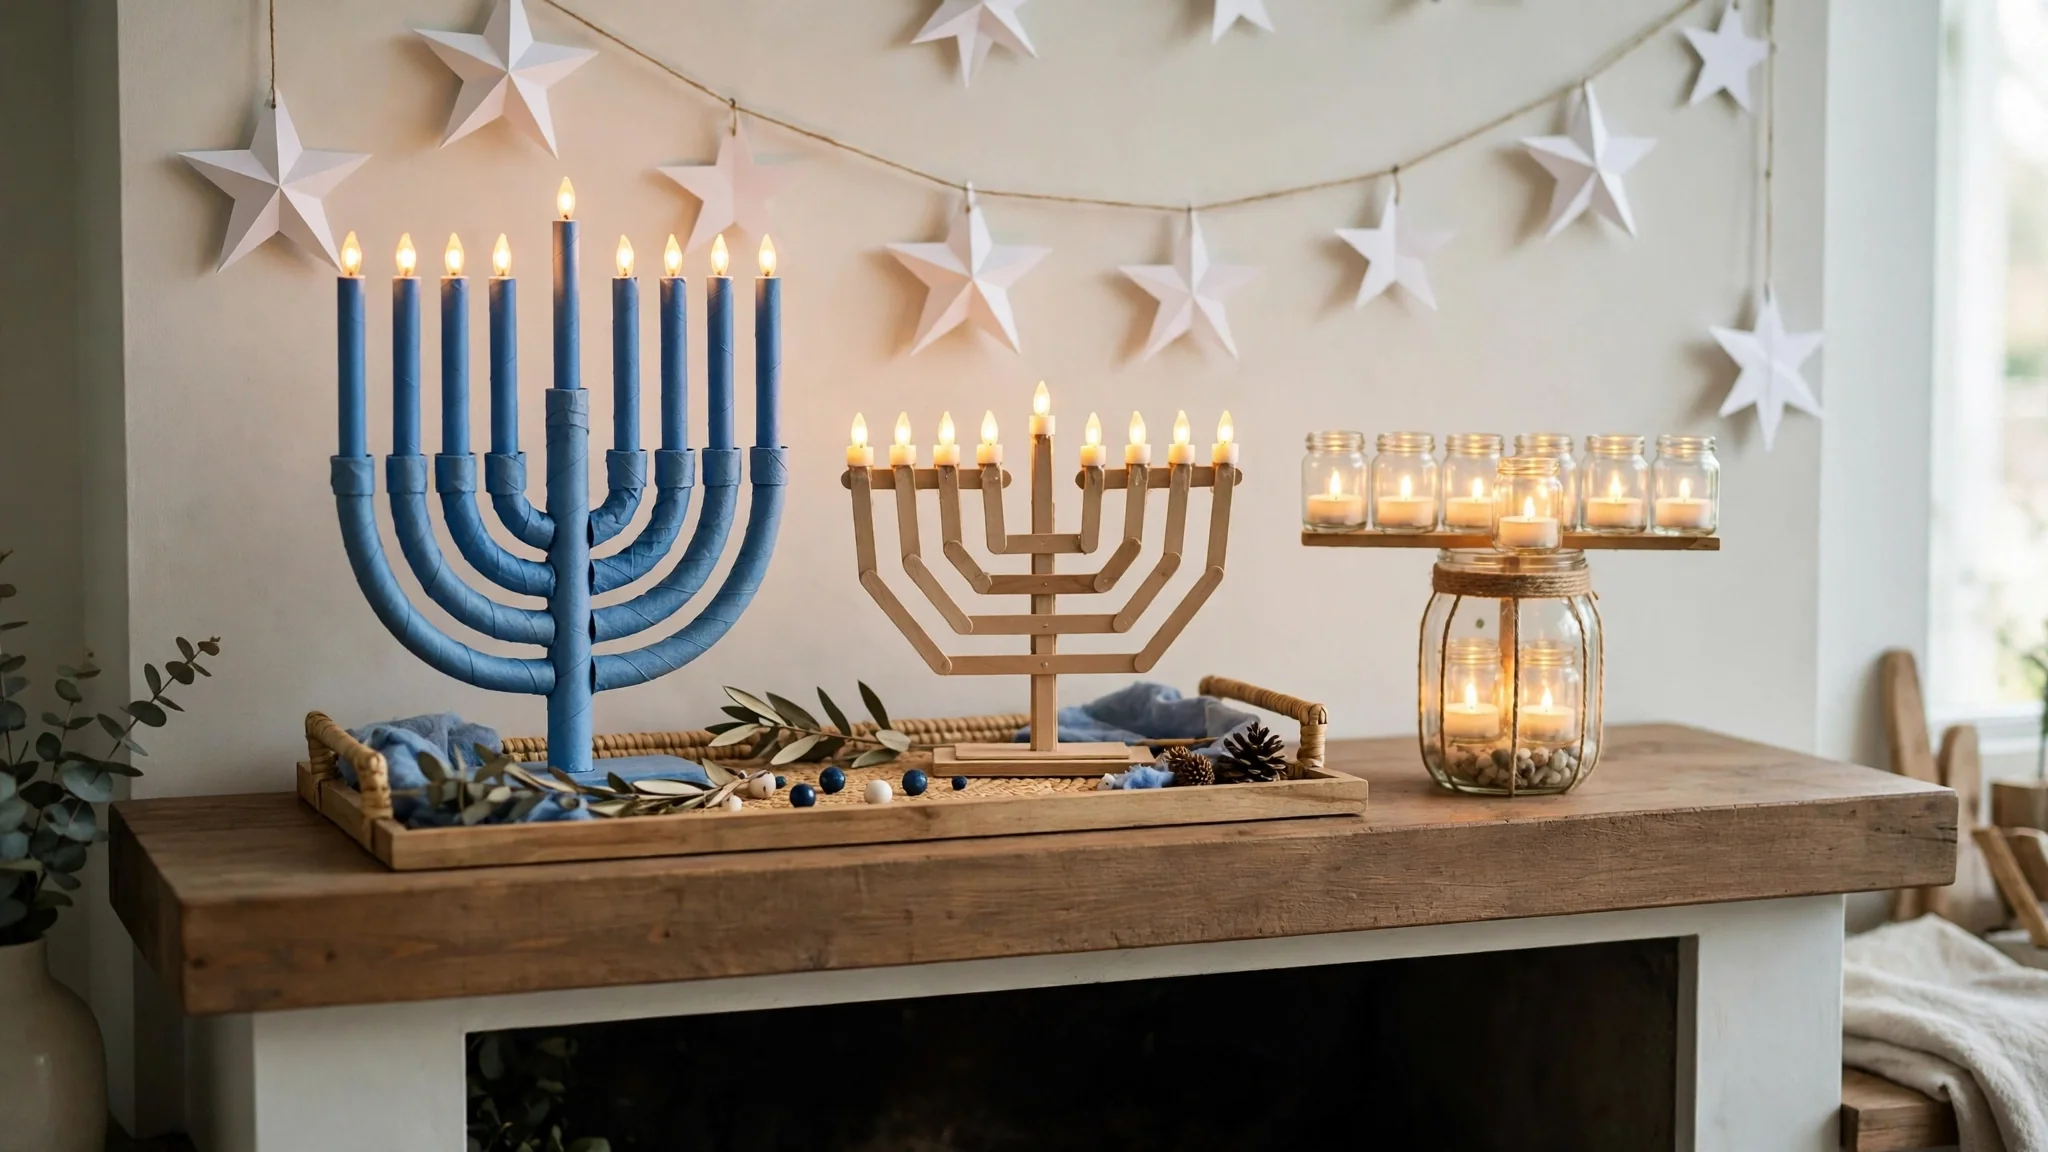
This guide has 15 DIY Hanukkah menorah ideas. Some use paper and paint. Some use wood, jars, or clay. Most are made for display and use LED lights. One idea is made to hold real candles, and it is for adults to make. Pick your favorites and start crafting!
Menorah Basics: What to Know Before You Craft
A Hanukkah menorah has nine branches. It is also called a hanukkiah.
- Eight branches are for the eight nights.
- The ninth branch holds the helper candle, called the shamash. It sits higher or lower than the others, or apart from them.
- The eight main lights are set in a straight line at the same height.
- Colors: blue, white, silver, and gold are popular.
Keep these ideas in mind when you build. Your menorah will look right and feel traditional.
Supplies and Age Guide
Keep these basics at home:
- Cardstock and construction paper in blue, white, and silver
- Scissors and glue sticks
- White school glue and hot glue (adult use)
- Washable paint and brushes
- Craft sticks and cardboard
- LED tea lights
- Clean jars and small tin cans
- Felt, ribbon, and twine
Age guide:
- Ages 2 to 4: handprints, tissue paper, and gluing with a grown-up helping.
- Ages 5 to 8: painting, simple cutting, and building with sticks and tubes.
- Ages 9 and up: most steps alone. An adult still handles hot glue, saws, drills, ovens, and real flames.
Easy Paper Menorah Crafts for Little Hands
1. Handprint Menorah Art (ages 2+)
You need: white or blue paper, washable paint, a paintbrush, wet wipes, yellow paper
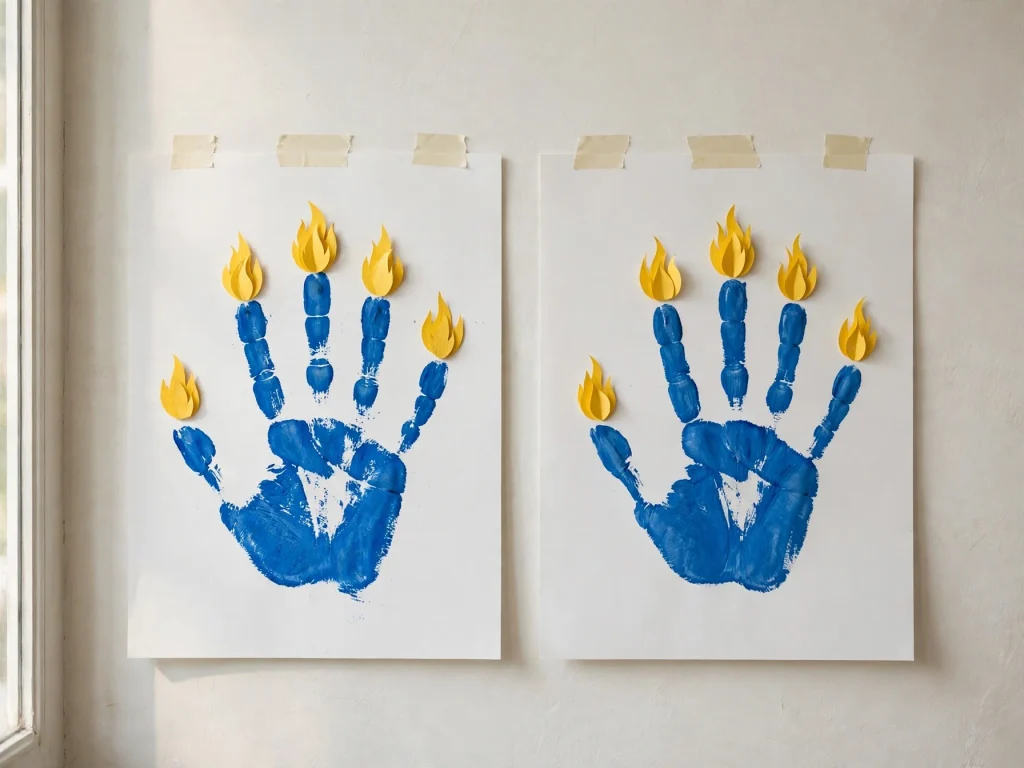
- Brush paint on one hand.
- Press it on the paper with the fingers spread.
- Press the other hand next to it. Keep the thumbs close in the middle.
- Let the paint dry.
- Cut a small yellow flame for each finger and glue it on top.
- Add one more candle between the thumbs for the shamash.
2. Paper Tube Menorah (ages 4+)
You need: 9 small cardboard tubes (cut from paper towel rolls), a cardboard base, paint, yellow paper, glue
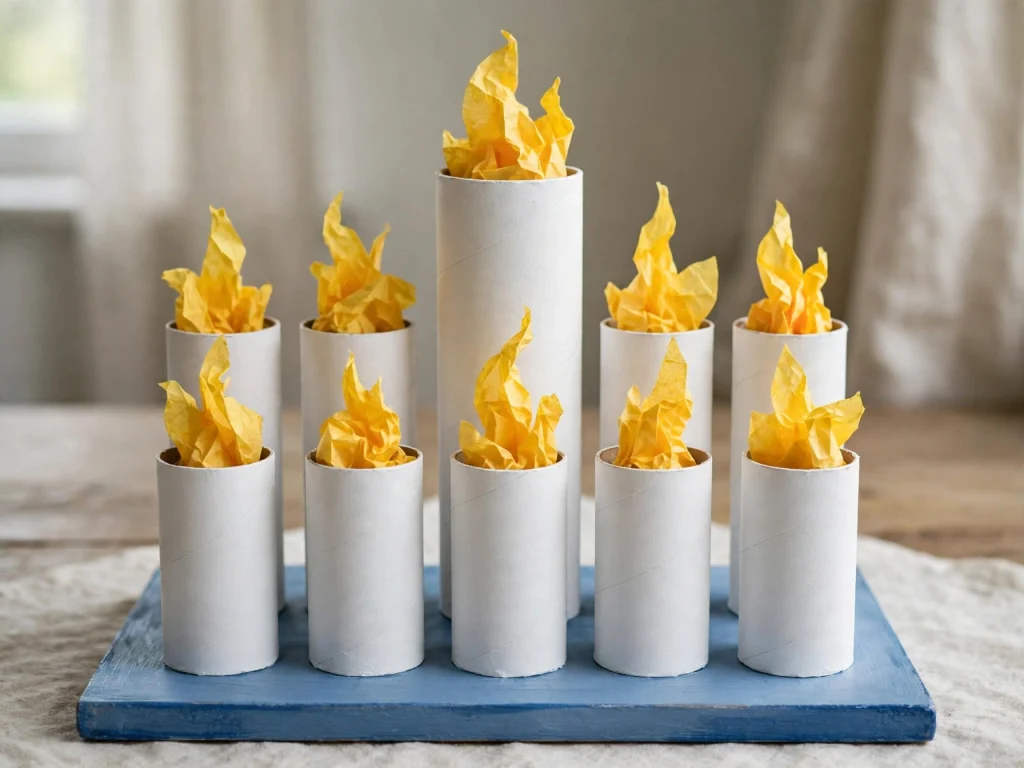
- Cut the tubes to 3 inches. Cut one tube to 4 inches for the shamash.
- Paint the base and the tubes. Let them dry.
- Glue the eight short tubes in a straight line on the base.
- Glue the tall tube in the middle, or just behind the row.
- Cut yellow paper flames and tuck one into each tube.
3. Paper Plate Menorah (ages 4+)
You need: 1 paper plate, blue paint, white paper, yellow paper, scissors, glue
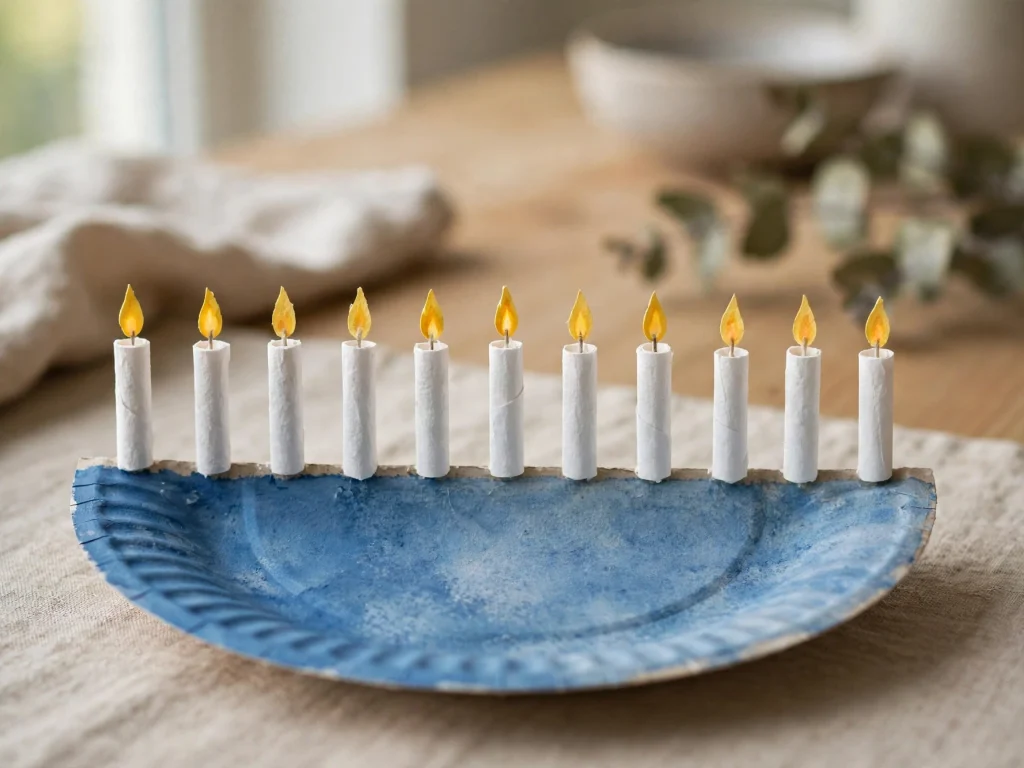
- Cut the plate in half. Use one half as the base.
- Paint it blue. Let it dry.
- Cut nine white paper strips for candles. Make the middle one taller.
- Glue the strips along the flat edge of the plate.
- Add yellow flames on top.
4. Tissue Paper Window Menorah (ages 3+)
You need: clear contact paper, tissue paper squares, scissors, tape, black marker
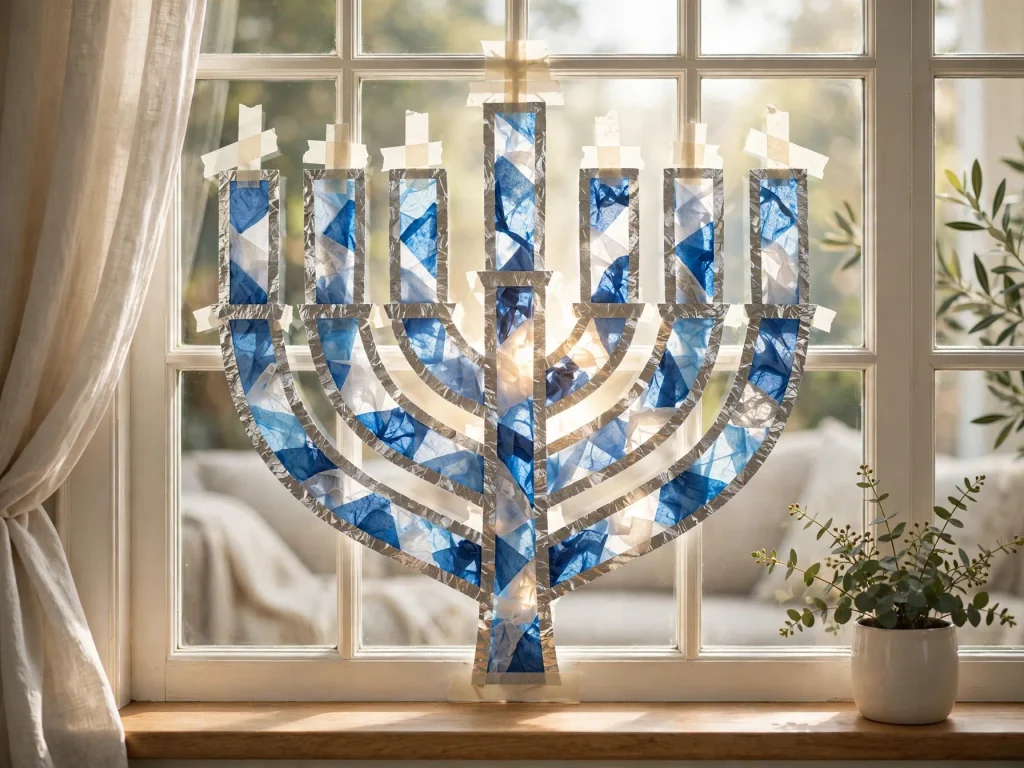
- Draw a menorah shape on one piece of contact paper with the marker.
- Peel the backing and place the paper sticky side up.
- Press tissue squares onto the sticky side. Use blue, white, and silver.
- Cover with a second piece of contact paper.
- Trim around the menorah shape.
- Tape it to a sunny window.
5. Button Menorah Art (ages 5+)
You need: cardstock, glue, buttons in blue, white, and silver, a pencil
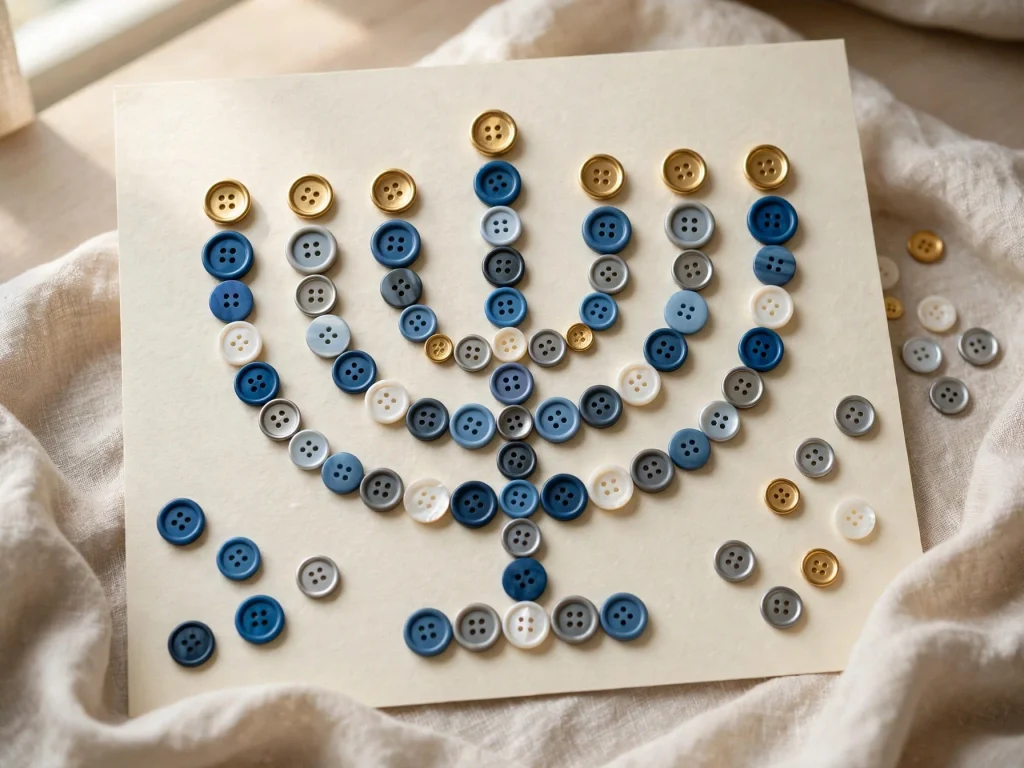
- Lightly draw a menorah on the cardstock with a pencil.
- Glue a row of buttons along each branch.
- Add a yellow or gold button on top of each branch for the flames.
- Let it dry flat.
Buttons are small. Keep this one away from children under 3.
6. Pipe Cleaner Menorah (ages 5+)
You need: 12 pipe cleaners, yellow beads or pom-poms, a small block of foam or a cardboard base
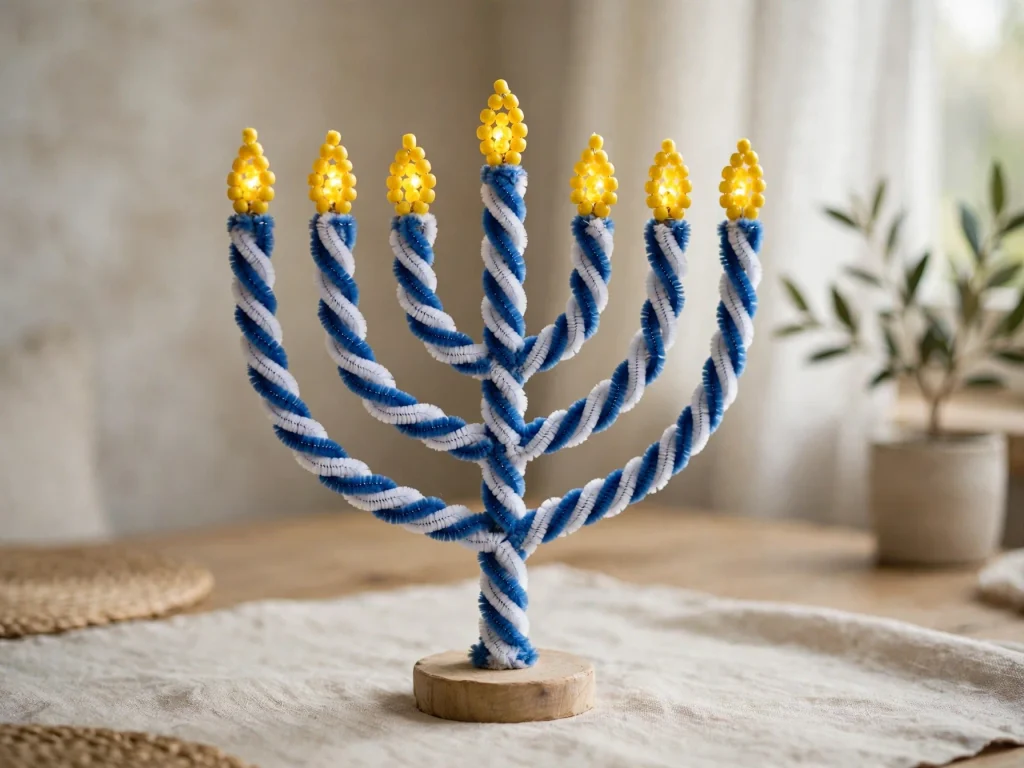
- Twist three pipe cleaners together to make a strong, straight base.
- Cut eight pipe cleaners to 3 inches. Cut one to 4 inches.
- Twist each short piece around the base, spaced evenly. Put the tall one in the middle.
- Add a yellow bead or pom-pom to the top of each branch for the flame.
- Press the base into the foam block or glue it to the cardboard so it stands.
Craft Stick, Clay, and Wood Menorahs
7. Craft Stick Menorah (ages 5+)
You need: 11 craft sticks, blue paint, a cardboard strip (8 by 2 inches), glue, yellow paper
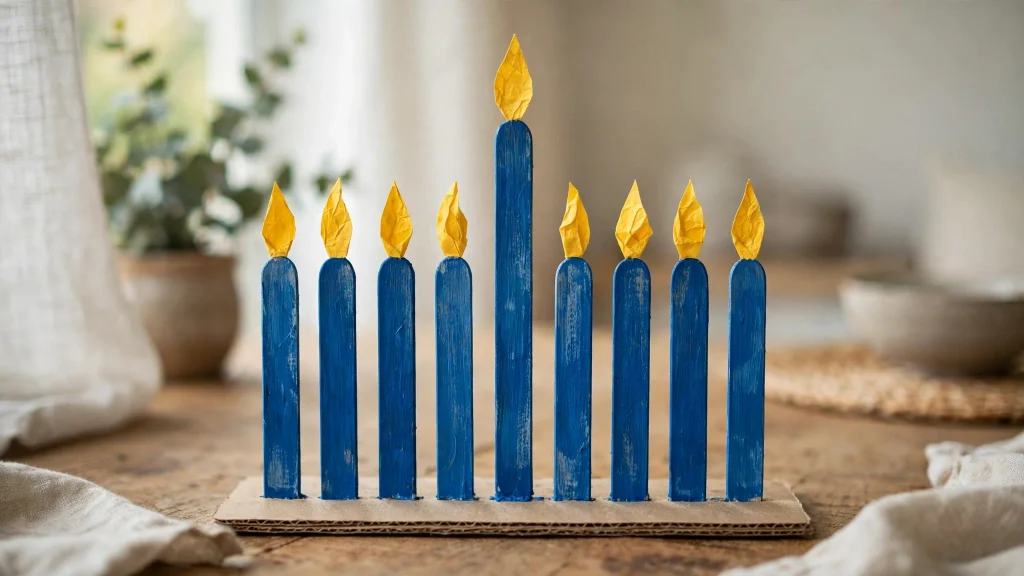
- Paint the sticks and the cardboard strip blue. Let them dry.
- Glue nine sticks upright along the cardboard strip with small gaps between them.
- Glue a half stick on top of the middle one to make it taller.
- Cut small flames from yellow paper and glue one to each stick.
- Let it dry flat before you stand it up.
8. Salt Dough Menorah (ages 6+, adult helps with the oven)
You need: 1 cup flour, 1/2 cup salt, 1/2 cup water, rolling pin, LED tea light, paint, brush, baking sheet, parchment paper

- Mix the flour, salt, and water until you get a smooth dough.
- Roll it into a long, thick base about 1/2 inch thick.
- Press an LED tea light into the dough nine times to make round cups. Raise the middle cup with a small extra block of dough.
- Remove the lights. Place the dough on a lined baking sheet.
- An adult bakes it at 250°F (120°C) for 2 to 3 hours, until hard and dry. Let it cool.
- Paint it and let it dry. Then add the LED lights.
This is a display piece. Do not use real candles in it. Do not eat the dough.
9. Wooden Block Menorah (ages 6+, adult cuts the wood)
You need: a wood board (about 12 by 2 inches), 8 wood blocks (2 inches tall), 1 wood block (3 inches tall), white paint, wood glue, yellow paper

- An adult cuts the blocks if you need them cut.
- Paint the blocks white and the board blue or natural. Let them dry.
- Glue the eight short blocks in a row on the board.
- Glue the tall block in the middle of the row, or just behind it.
- Cut yellow paper flames and glue one on top of each block.
10. Wood Plank LED Menorah (ages 10+, adult uses the drill)
You need: a plank about 14 by 3 by 1 1/2 inches, a drill with a 1 1/2 inch bit, sandpaper, paint or wood stain, 9 LED tea lights
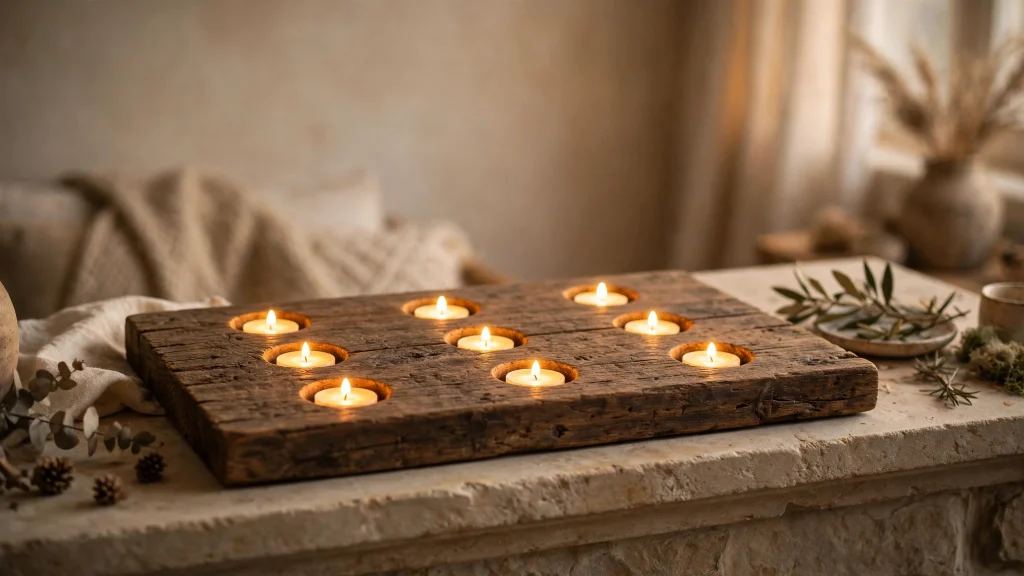
- An adult marks nine evenly spaced spots on the plank.
- An adult drills a shallow hole at each mark. The hole should fit an LED tea light.
- Sand the board until it is smooth.
- Stain or paint it. Let it dry fully.
- Place an LED tea light in each hole.
This menorah is for display only. Use LED lights, not real candles.
Table and Mantel Menorahs
11. Mason Jar Tray Menorah (ages 6+)
You need: 9 small clean jars, a long tray, blue ribbon, LED tea lights, small pebbles

- Tie ribbon around the neck of each jar.
- Place five pebbles in the bottom of each jar to hold the light steady.
- Set eight jars in a straight line on the tray.
- Put the ninth jar in the middle, up on a small box or book, so it sits higher.
- Add an LED tea light to each jar.
12. Tin Can Menorah (ages 10+, adult helps)
You need: 9 small clean tin cans (tuna or cat food size), paint, a wood or tray base, strong glue, LED tea lights
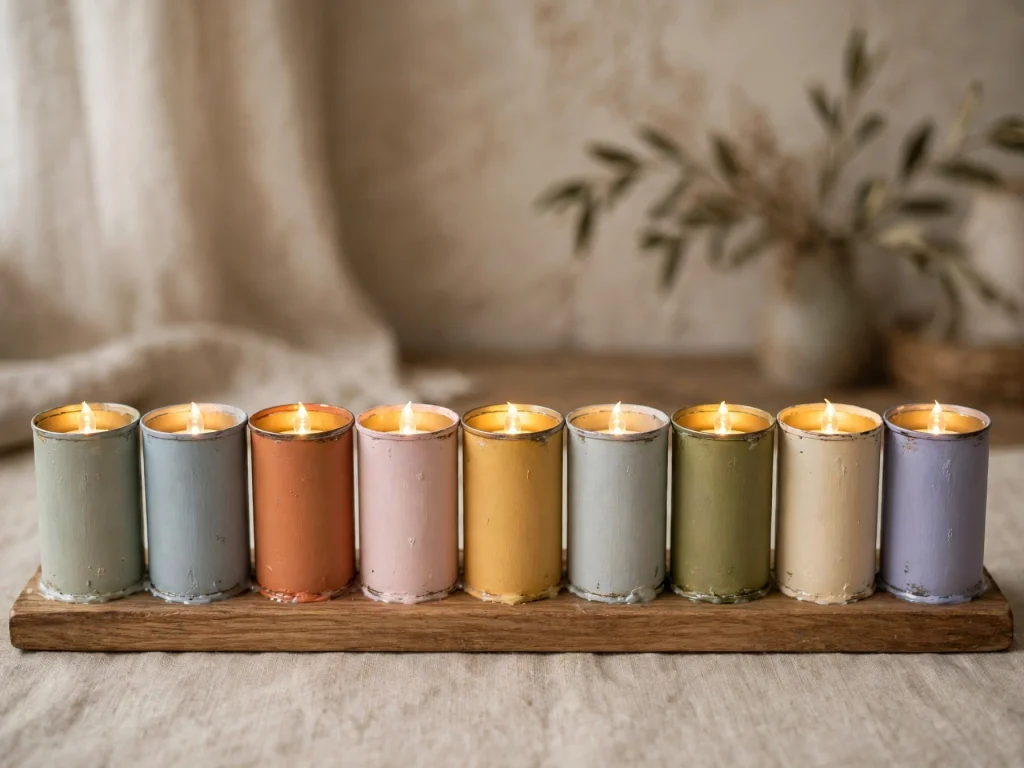
- An adult checks that each can has a smooth edge. Do not use any can with sharp edges.
- Wash and dry the cans. Paint them blue, white, or silver. Let them dry.
- Glue the cans to the base in a straight row. Put one a little higher or apart for the shamash.
- Let the glue dry fully.
- Place an LED tea light in each can.
13. Driftwood Menorah (ages 8+)
You need: a flat piece of driftwood or a sanded branch, a drill (adult only), 9 LED tea lights or small LED lights, white paint pen

- Pick a piece that lies flat and does not rock.
- Wash it and let it dry fully.
- Place nine LED tea lights on top. Space eight evenly in a line.
- Set one slightly apart or higher for the shamash. A small stone under it works well.
- Add a white dot or star with the paint pen between the lights.
14. Felt Menorah Wall Hanging (ages 8+, younger with help)
You need: blue felt, white felt, yellow felt, fabric glue, scissors, a wooden dowel, twine

- Cut a large menorah shape from white felt.
- Glue it onto a blue felt rectangle.
- Cut nine small yellow flames and glue one on each branch.
- Fold the top of the blue felt over the dowel and glue it down.
- Tie twine to each end of the dowel and hang it on the wall.
A Menorah for Real Candles
15. Sand Tray Menorah (adults only)
This idea uses real flames, so an adult should make and light it. Use only non-flammable materials. Follow your family’s tradition for lighting.

You need: a metal baking pan or metal tray, clean dry play sand, 9 Hanukkah candles, a lighter or match
- Place the metal pan on a hard, flat, non-flammable surface.
- Fill it with 1 1/2 inches of clean, dry sand.
- Push eight candles into the sand about 1 inch deep, in a straight line at the same height.
- Place the ninth candle apart from the row, or a little higher, for the shamash.
- Keep all paper, felt, garlands, and curtains far away from the tray.
- An adult lights the candles. Never leave them alone.
- Let the candles burn down fully and cool before you clean up.
Simple Tips for Better DIY Menorahs
- Keep the eight main lights at the same height and in a straight line.
- Put the shamash higher, lower, or apart.
- Pick two or three colors and keep them the same across your crafts.
- Use a heavy base so your menorah does not tip.
- Test LED lights before you glue them in.
- Paint in thin layers and let each one dry.
- Let kids decorate the base with stars, dots, or stripes.
Make-Ahead Planning Guide
Hanukkah dates change each year, so check a calendar.
- 3 weeks before: Pick your ideas and buy supplies.
- 2 weeks before: Make the salt dough, wood, and tin can menorahs. They need drying time.
- 1 week before: Make the paper and felt menorahs.
- 2 to 3 days before: Place your menorahs on the mantel, windowsill, or table.
- First night: Add LED lights or light the real menorah as your family does.
Safety and Allergy Notes
- An adult should handle hot glue, drills, saws, ovens, and sharp scissors.
- Use spray paint outside only, and only an adult should use it.
- Display crafts are for LED lights only. Never put real candles in paper, felt, wood, salt dough, or painted cardboard.
- Real candles belong only in a non-flammable menorah, lit by an adult. Keep them away from anything that can burn.
- Never leave burning candles alone.
- Keep small parts like buttons, beads, and pom-poms away from children under 3.
- Salt dough and clay are not food. Do not let children eat them.
- Salt dough contains wheat flour. Use caution with allergies.
- Use non-toxic paint and glue.
- Check tin cans for sharp edges before kids touch them.
FAQ
What is the difference between a menorah and a hanukkiah?
A hanukkiah has nine branches and is used on Hanukkah. Many people in the US just call it a menorah.
How many candles does a Hanukkah menorah hold?
Nine. Eight are for the eight nights, and one is the helper candle.
Can I use LED lights in my homemade menorah?
Yes, for display. For a lighting ceremony, many families use real candles in a proper menorah. Follow your own tradition.
What is an easy menorah craft for toddlers?
Try the handprint menorah or the tissue paper window menorah. Keep a grown-up close.
What can I use as a base for a menorah?
Cardboard, wood, a metal tray, or a flat piece of driftwood all work. A heavy base keeps it from tipping.
When should I make my menorah?
Start 2 to 3 weeks before Hanukkah. This gives paint and clay time to dry.
Final Thoughts
A handmade menorah adds warmth to your Hanukkah table. Start with one simple craft, and add more if you like. Let the kids help, because their handprints and paint dots make it special. Happy crafting and happy Hanukkah!