Hanukkah Handprint Crafts for Toddlers: 13 Easy Ideas
Hanukkah is the Festival of Lights. It lasts eight nights. Many families decorate with blue, white, silver, and gold.
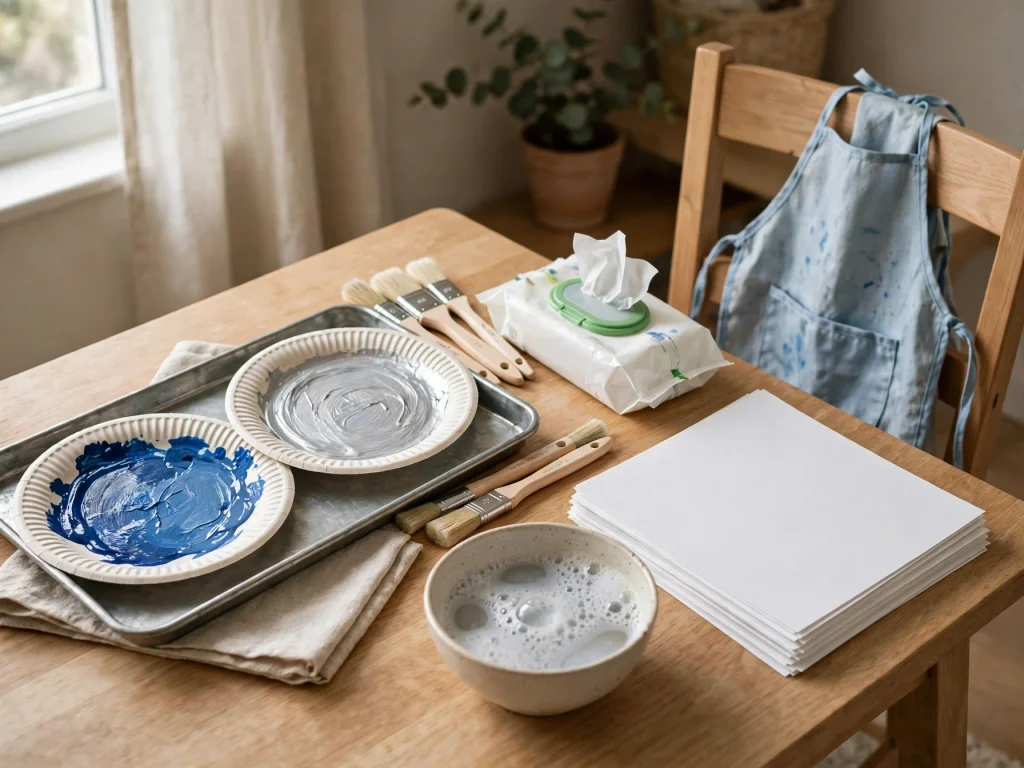
Toddlers love to press, stamp, and squish. A handprint is the perfect craft for them. It is quick, it is messy in a good way, and it makes a sweet keepsake. Little hands grow fast, so these crafts are also fun to save. This guide has 13 easy handprint and footprint ideas for ages 1 to 3. An adult does the hard parts. Pick a few and enjoy crafting together!
Hanukkah Symbols to Talk About
Keep it short and simple while you craft.
- The dreidel is a spinning top with four sides.
- The menorah has nine branches. Families light it for eight nights.
- Gold coins remind many families of gelt.
- Stars and lights are part of the holiday look.
- Blue, white, silver, and gold are the most common colors.
You can say “dreidel” or “light” while a toddler presses their hand. It is a gentle way to learn.
Toddler Safety First
Toddlers put things in their mouths. Plan for it.
- Use washable, non-toxic paint labeled safe for children.
- Skip glitter, googly eyes, buttons, beads, and pom-poms. These are choking hazards.
- Stay within arm’s reach the whole time.
- Wash hands and feet right after printing.
- If your child has sensitive skin, test a small dot of paint on the arm first.
- Use the taste-safe paint below for children who still mouth everything.
Taste-Safe Yogurt Paint (Mini Recipe)
This paint is gentle for toddlers who taste their art. It is not a snack. It is made to be safe if a little goes in the mouth.
Prep time: 5 minutes | Makes: about 1/2 cup
Ingredients
- 1/2 cup plain whole milk yogurt
- 3 to 4 drops blue gel food coloring (add more for a deeper blue)
Steps
- Spoon the yogurt into a small bowl.
- Add the food coloring a drop at a time.
- Stir until the color is even.
- Brush it on the hand with a soft brush or press the hand into the bowl.
- Use it the same day. Keep it in the fridge until you start.
This paint stains clothes. Use a smock. It contains dairy. Do not use it for children with a milk allergy. Throw away leftover paint and do not save it for later.
Supplies and Age Guide
Keep these basics at home:
- White and blue cardstock
- Butcher paper or kraft paper
- Washable paint in blue, white, silver, and gold
- Soft brushes and sponges
- Paper plates (to hold paint)
- Clear contact paper
- Tissue paper
- Air-dry clay
- Wet wipes, towels, and a smock
- A pen or paint pen (adult use for names and dates)
Age guide:
- Ages 1 to 2: handprints, footprints, and gentle pressing. An adult paints the hand and guides every step.
- Ages 2 to 3: pressing their own hand in a plate of paint, tearing tissue, and helping with simple steps.
- An adult always handles scissors, hole punches, ovens, and hot tools.
Handprint Hanukkah Wall Art for Toddlers
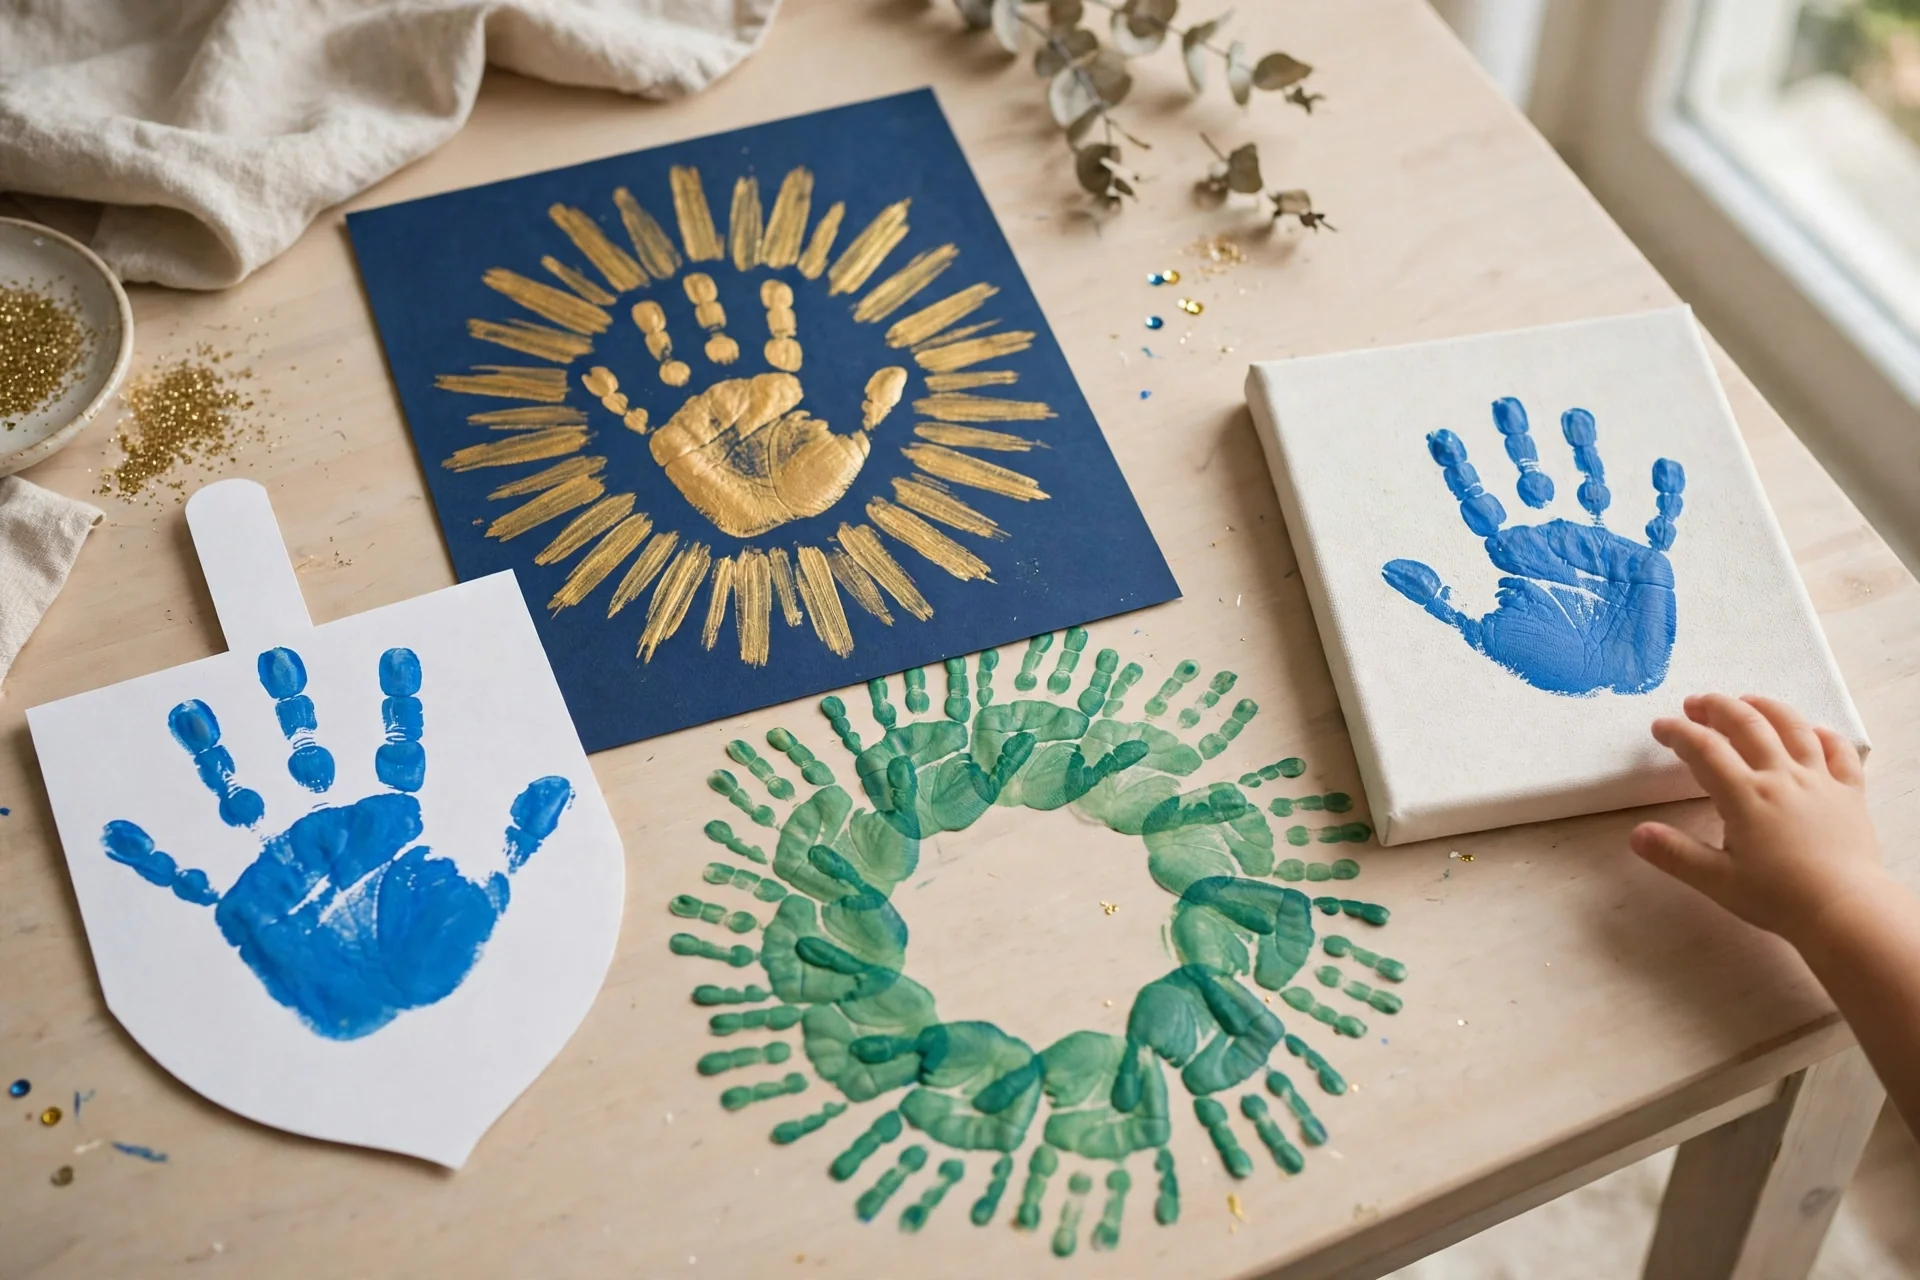
1. Handprint Dreidel (ages 1+)
You need: white cardstock, blue washable paint, a soft brush, wet wipes, a gold paint pen (adult)
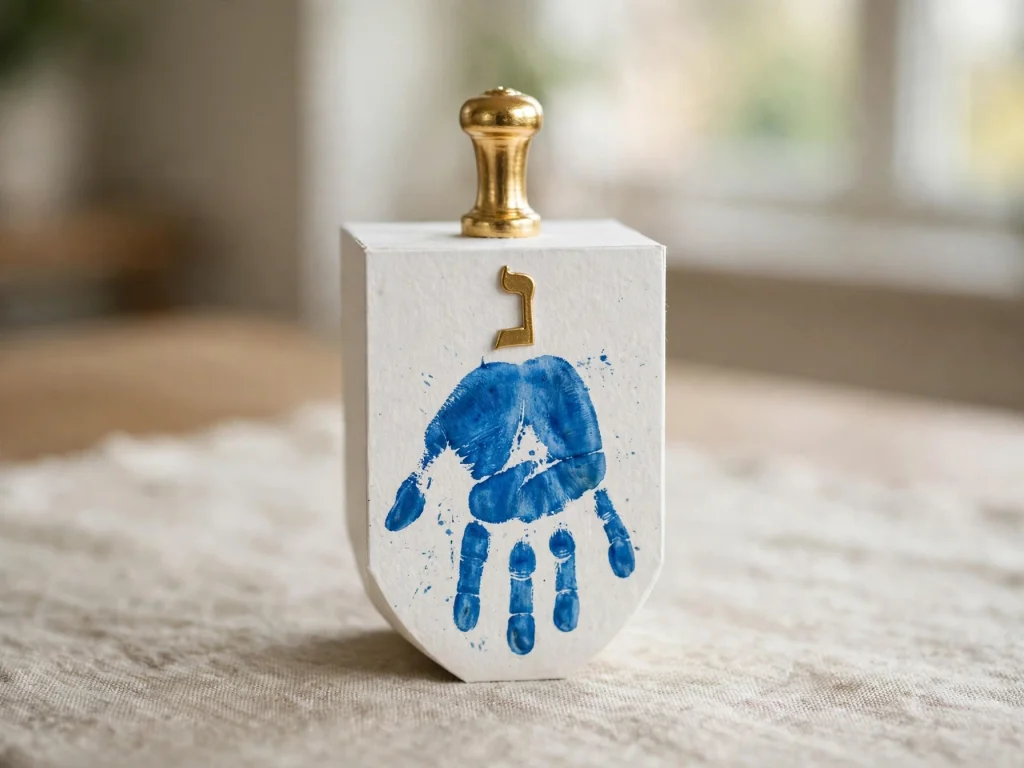
- Tape the paper to the table so it does not slide.
- An adult brushes blue paint over the child’s palm and fingers.
- Press the hand flat on the paper with the fingers together and pointing down. The shape looks like a dreidel.
- Lift the hand straight up. Wipe it clean right away.
- Let the paint dry.
- An adult draws a short handle on the top and one Hebrew letter on the palm with the gold pen.
2. Festival of Lights Handprint Sunburst (ages 2+)
You need: dark blue cardstock, gold or yellow washable paint, a paper plate, a brush, wet wipes
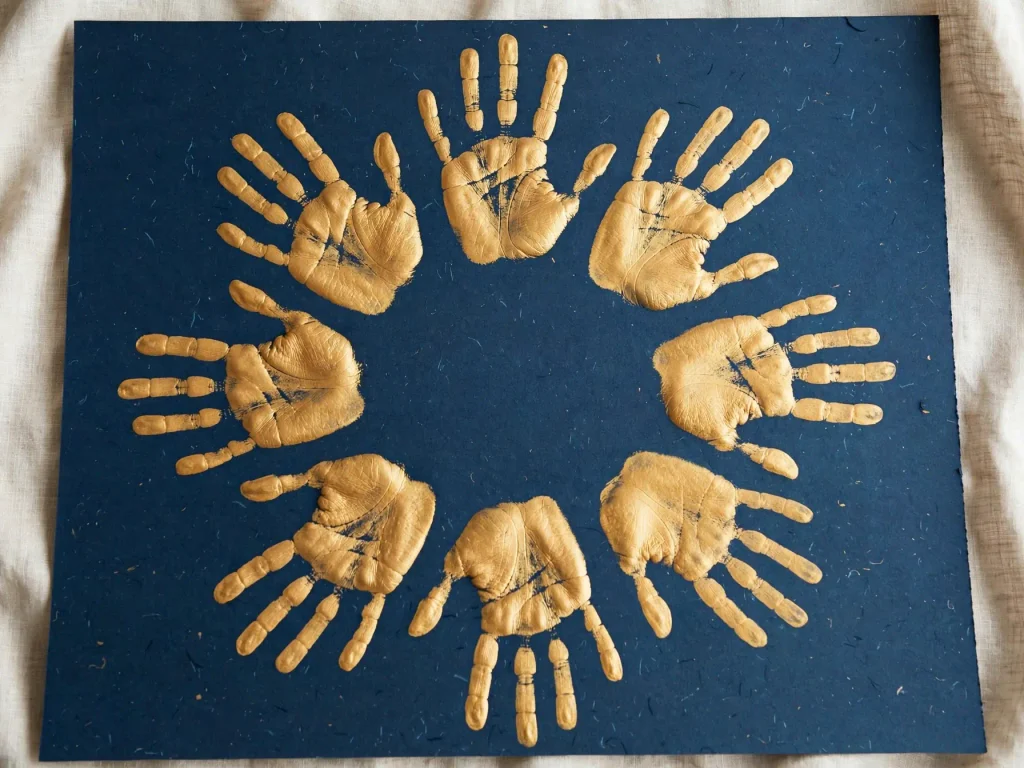
- Place the paper flat on a table. Draw a small circle in the middle with a pencil (adult).
- Brush gold paint on the child’s palm.
- Press the hand next to the circle, with the fingers pointing out.
- Turn the paper a little. Press again.
- Make 8 prints in a ring for the eight nights. Count them together out loud.
- Let it dry flat.
3. Cut-Out Handprint Wreath (ages 2+, adult cuts)
You need: white and blue paper, washable paint, scissors (adult), cardboard ring (adult cuts), glue stick, ribbon
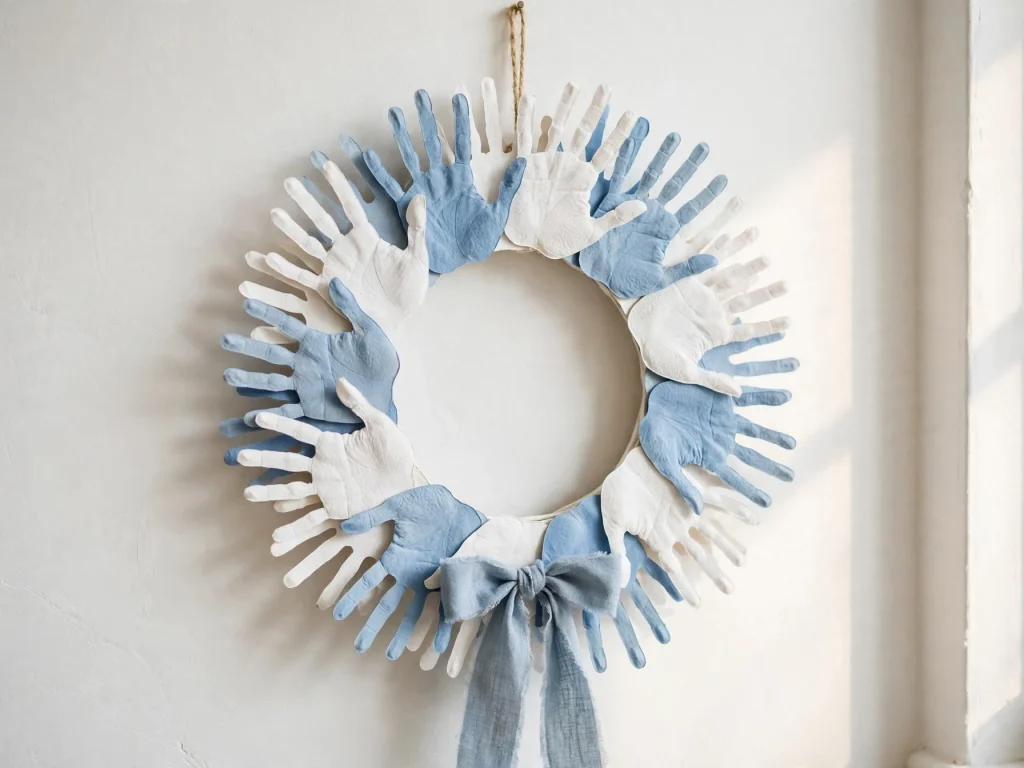
- Press painted hands on white paper. Make 8 to 10 prints. Let them dry.
- An adult cuts out each handprint.
- Glue the handprints around the cardboard ring so the fingers point out.
- Overlap them to hide the cardboard.
- Tie a ribbon loop on the back and hang the wreath on a wall.
Hang it out of reach. Ribbons are a hazard for toddlers.
4. Footprint Dreidel (ages 1+, adult helps)
You need: white cardstock, blue washable paint, a brush, a bowl of warm water, a towel, a gold paint pen (adult)

- Set a towel and a bowl of warm water by the table.
- An adult holds the child on their lap. Brush blue paint on the bottom of the foot.
- Press the foot on the paper with the toes at the top. The wide toes and narrow heel look like a dreidel.
- Lift the foot. Wash it right away.
- When it dries, add a handle on top and a letter with the gold pen.
5. Handprint Garland (ages 2+, adult cuts and hangs)
You need: white and blue cardstock, washable paint, scissors and hole punch (adult), thick string
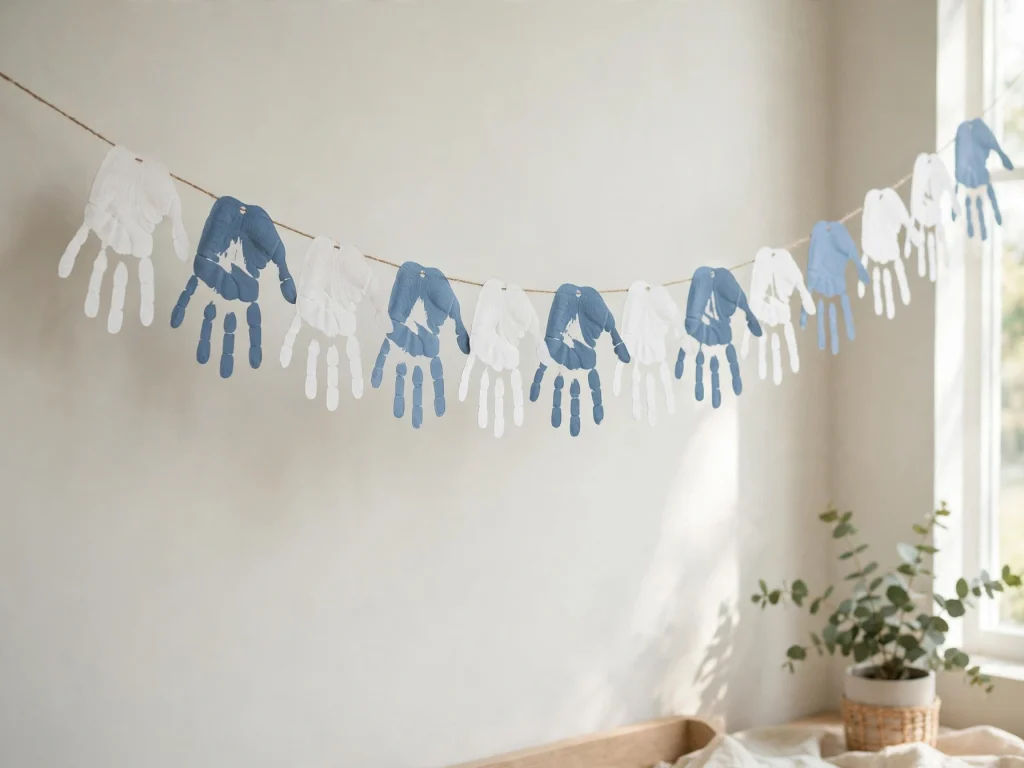
- Press hands on cardstock to make 6 to 8 prints. Let them dry.
- An adult cuts out each print.
- Punch two holes near the top of each one.
- Thread the string through the holes.
- Hang the garland high on a wall or mantel, well out of reach.
Window, Table, and Gift Handprint Crafts
6. Contact Paper Handprint Suncatcher (ages 1+, adult cuts)
You need: clear contact paper, tissue paper in blue, white, and silver, scissors (adult), tape

- An adult traces the child’s hand on the backing paper. Peel the backing off.
- Place the contact paper sticky side up on the table. Tape the edges down.
- Tear tissue paper into small pieces, or have the child tear it.
- Press the pieces onto the sticky side.
- Cover with a second piece of contact paper. Press flat.
- An adult cuts out the handprint shape. Tape it to a window.
Watch your toddler closely. Tissue paper can end up in the mouth.
7. Handprint Placemat (ages 2+)
You need: white or blue construction paper, washable paint, clear contact paper, scissors (adult)
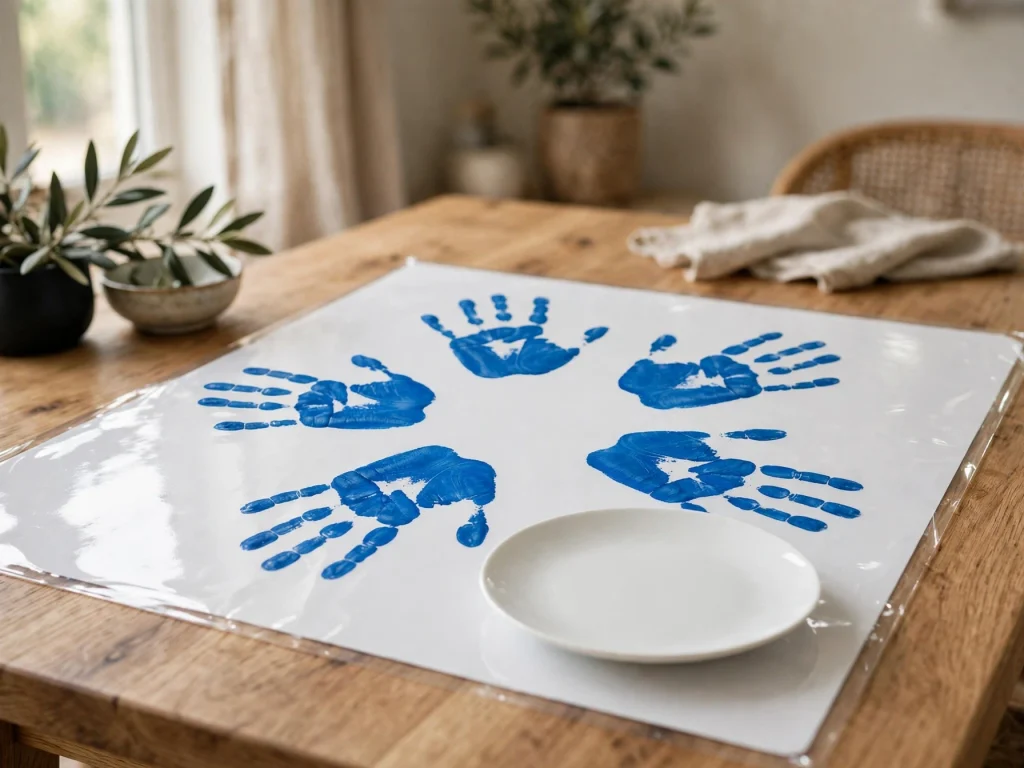
- Press a hand on the paper. Use blue paint for a star pattern or two prints side by side.
- Let it dry fully.
- An adult covers both sides with clear contact paper.
- Trim the edges.
- Wipe it clean after meals. Use it at the Hanukkah table.
8. Handprint Table Runner (ages 1+, great for a group)
You need: butcher paper (about 3 feet long), blue, white, and silver washable paint, paper plates, wet wipes, tape
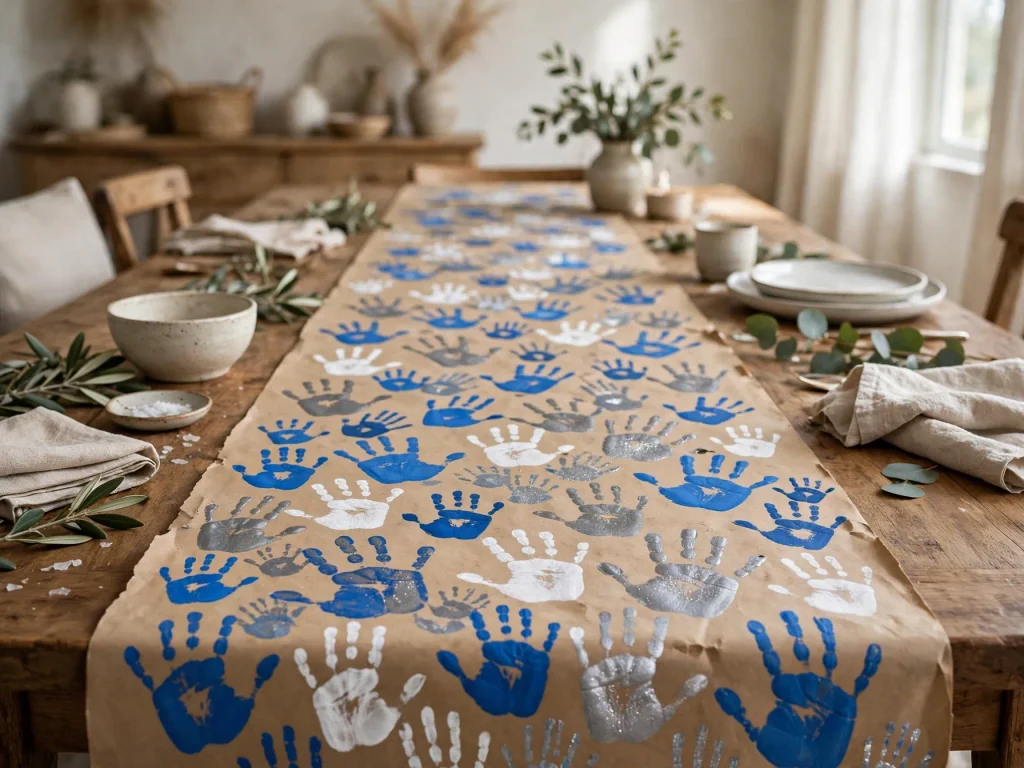
- Roll out the butcher paper on the floor. Tape the corners.
- Pour a little paint on each plate.
- Let each child press their hand in the paint and then onto the paper. Use different colors.
- Add the child’s name and age next to each print with a pen (adult).
- Dry for a few hours.
- Use it on the table, or roll it up for a keepsake.
9. Handprint Wrapping Paper (ages 1+)
You need: kraft or white paper, blue and silver washable paint, paper plates, wet wipes
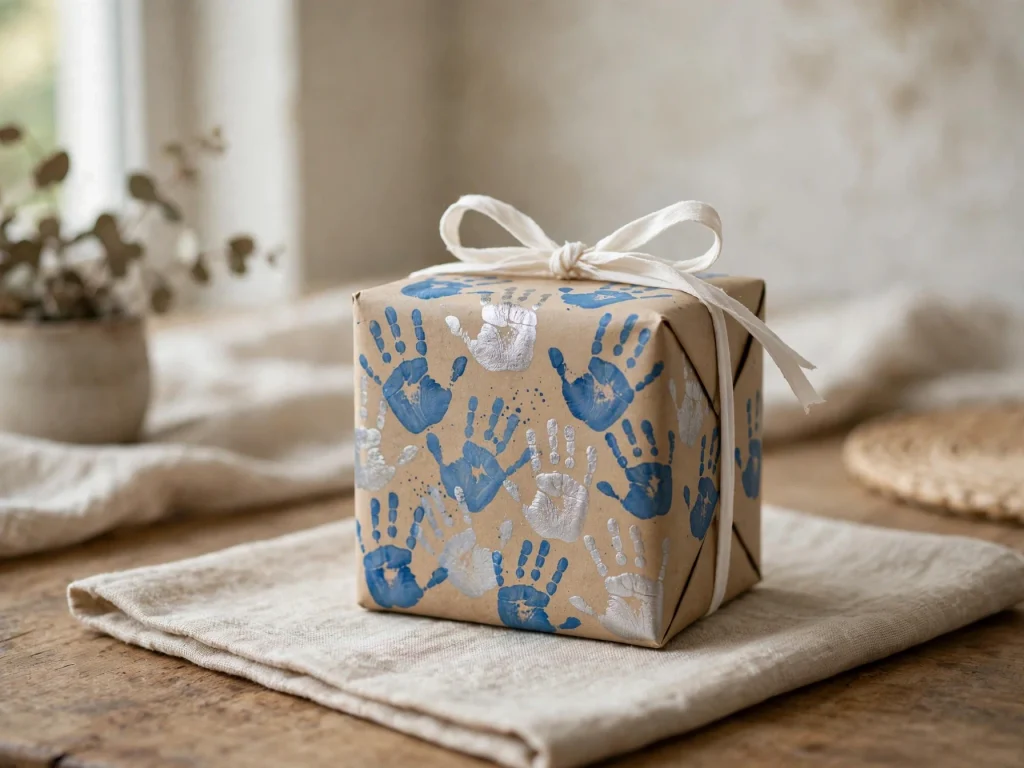
- Lay out a big sheet of paper.
- Press hands in paint and then on the paper. Spread the prints out.
- Add a few fingerprint dots between the hands.
- Let it dry for a few hours.
- Use it to wrap a small gift for a grandparent.
Handprint Hanukkah Keepsakes
10. Handprint Canvas (ages 1+)
You need: a small canvas (8 by 10 inches), blue, white, and silver washable paint, a brush, a paint pen (adult)
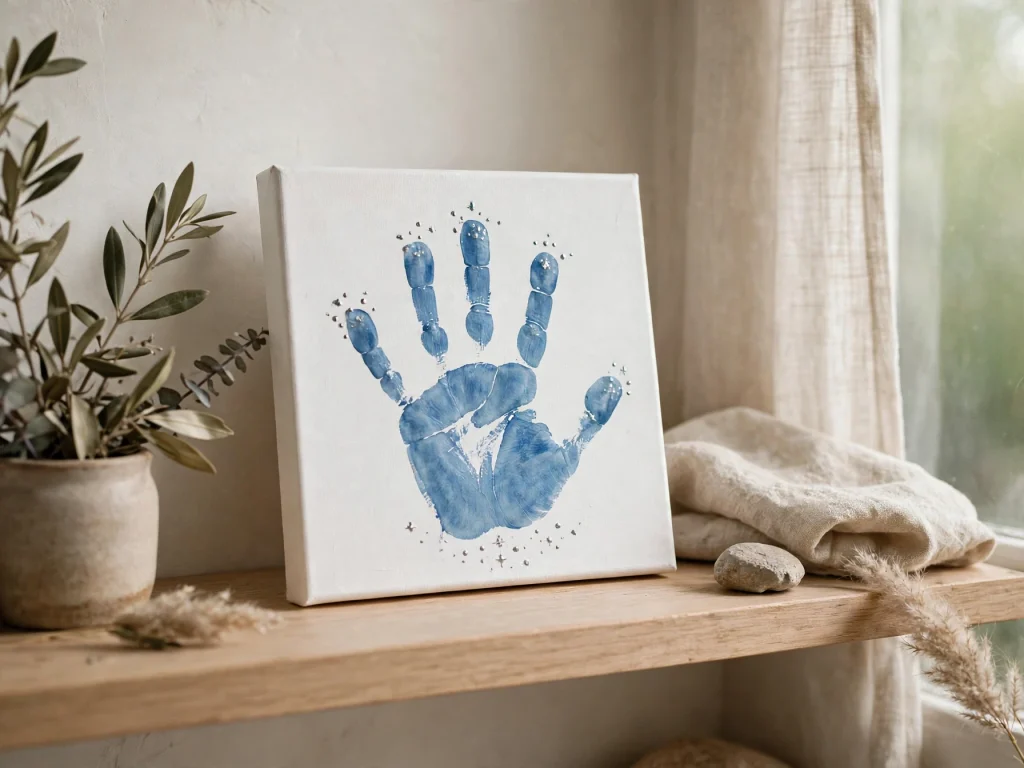
- Paint the canvas white with a wide brush and let it dry.
- An adult paints the child’s hand blue.
- Press the hand on the canvas.
- Add silver fingertip dots around the print like stars.
- When dry, an adult writes the child’s name and the year with the paint pen.
- Hang it each year at Hanukkah.
11. Air-Dry Clay Handprint Dish (ages 2+, adult helps)
You need: air-dry clay (about 6 oz), a rolling pin, a small bowl, paint, a brush, clear sealer (adult)
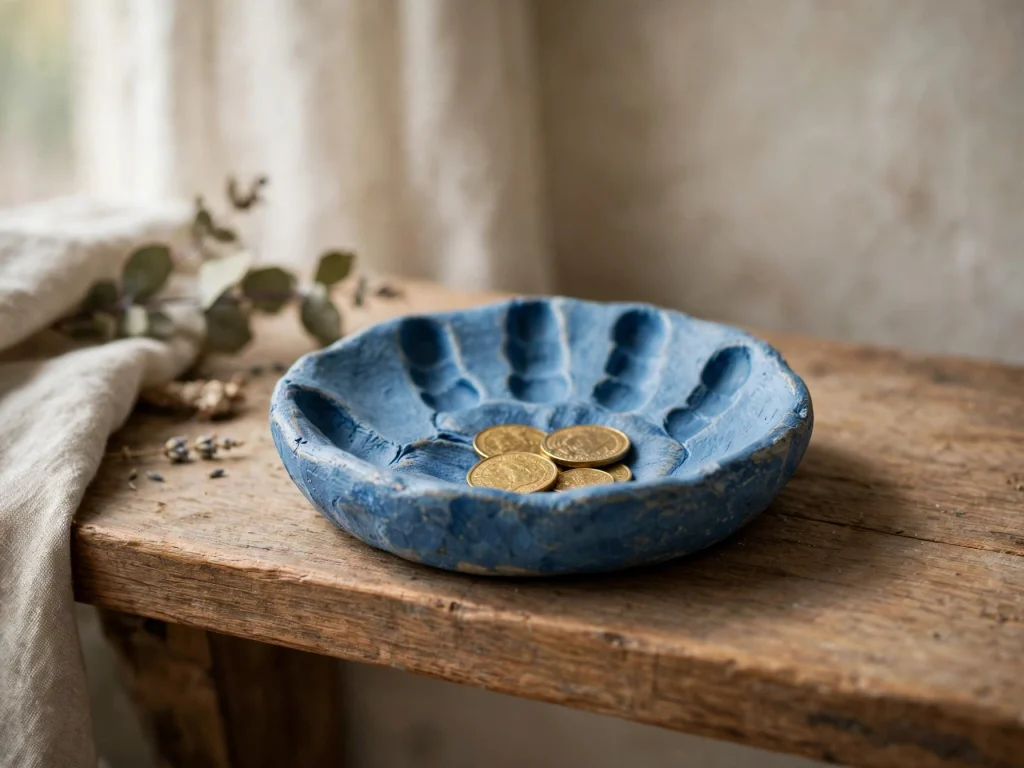
- Roll the clay flat, about 1/2 inch thick.
- Press the child’s hand firmly into the clay. Lift it straight up.
- An adult cuts around the print and lifts it onto an upside-down bowl to shape the dish. Let it dry on the bowl.
- Dry for 24 to 48 hours, as the package says.
- Paint it blue and let it dry.
- An adult adds a coat of sealer.
Use this dish for keys, rings, or gelt wrappers only. Do not use it for food. Do not let toddlers eat the clay.
12. Handprint Tote Bag (ages 2+, adult handles fabric paint)
You need: a plain cotton tote bag, fabric paint in blue or silver, a sponge brush, cardboard (to slip inside the bag), wet wipes
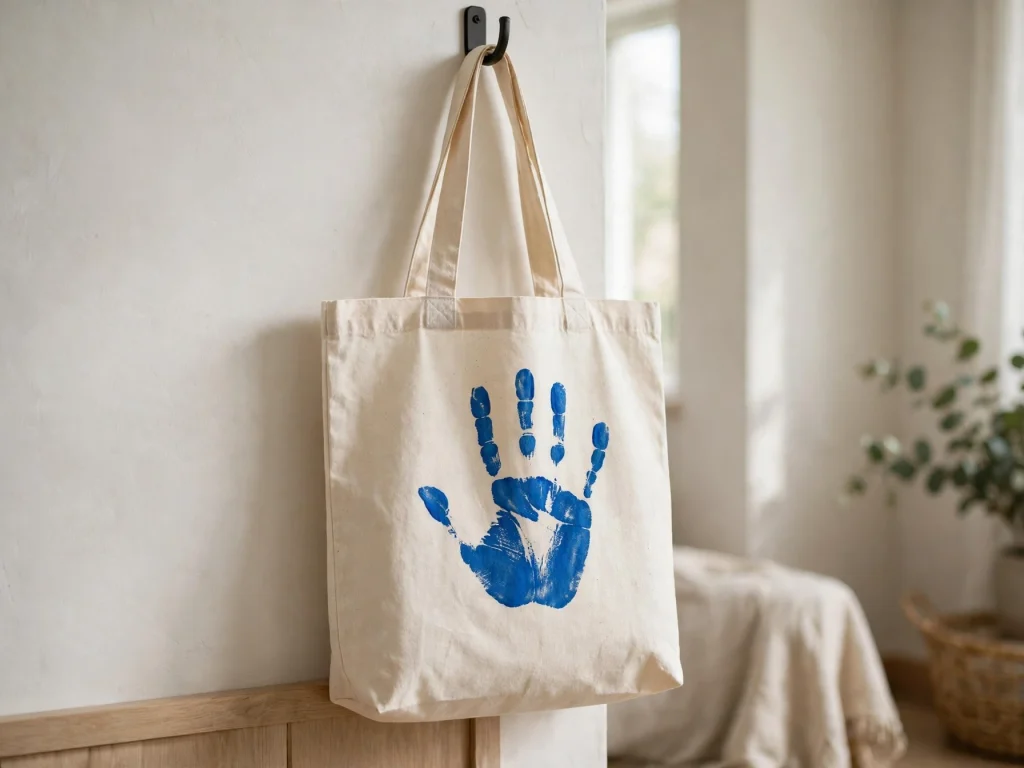
- Put a piece of cardboard inside the bag. This keeps the paint from soaking through.
- An adult sponges fabric paint on the child’s palm.
- Press the hand on the bag. Lift it straight up.
- Wipe the hand right away with a wet wipe, then wash it with soap.
- Dry the bag flat for 24 hours.
- Follow the paint label to set it. An adult handles any iron.
13. Handprint Greeting Card for Grandparents (ages 1+)
You need: folded blue cardstock, white washable paint, a brush, a pen (adult)
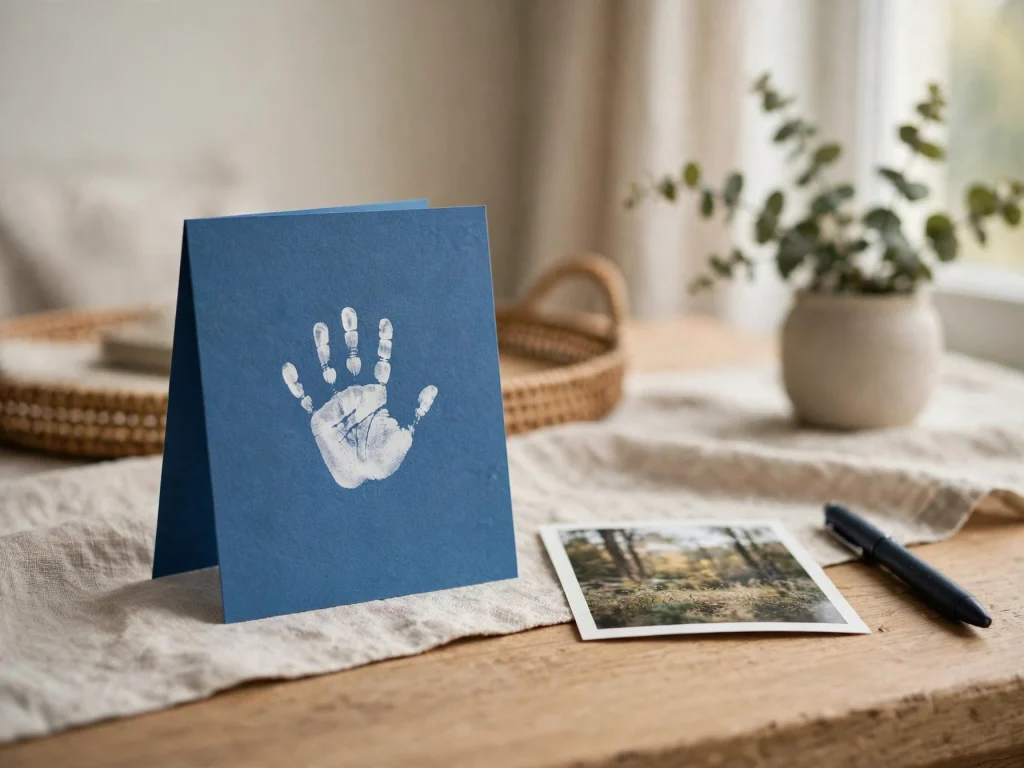
- Brush white paint on the child’s palm.
- Press the hand on the front of the card.
- Let it dry.
- An adult writes “Happy Hanukkah” and the child’s name and age inside.
- Add a small photo of the child if you like.
- Mail it or give it in person.
Simple Tips for Toddler Handprint Crafts
- Set up before you invite the toddler. Tape paper down and put out wet wipes.
- Paint only a thin layer on the hand. Too much paint smears.
- Press and lift straight up for a clean print.
- Keep a bowl of warm soapy water and a towel close.
- Do one craft at a time. Toddlers lose focus fast.
- Write the date and age on the back of every keepsake.
- Take a photo of the child next to the finished craft.
- Do not worry if the print is messy. A smudge is part of the memory.
Make-Ahead Planning Guide
Hanukkah dates change each year, so check a calendar.
- 3 weeks before: Pick your crafts and gather supplies.
- 2 weeks before: Make the clay dishes. They need drying time.
- 1 week before: Make canvases, totes, and the table runner. Let them dry fully.
- 2 to 3 days before: Make cards, wrapping paper, and garlands.
- First night: Show the crafts to your family. Light your menorah the way your family does.
For daycares: Use butcher paper and set up one station. Print one child at a time with an adult beside them.
Safety and Allergy Notes
- An adult should handle scissors, hole punches, sealers, hot tools, and ovens.
- Use only washable, non-toxic paint, glue, and markers.
- Watch toddlers closely at all times. Tissue paper, paint, and clay can end up in mouths.
- Skip small parts like beads, buttons, googly eyes, and pom-poms. They are choking hazards for children under 3.
- Keep string and ribbon short and out of reach.
- Clay and paint are not food. The yogurt paint is gentle for mouthing, but it is not a snack.
- Yogurt paint contains dairy. Do not use it for children with a milk allergy.
- Check food coloring labels for allergens.
- Wash hands and feet right after painting.
- No real candles near crafts. Use LED lights for display.
- Real candles belong only in a proper menorah, lit by an adult. Follow your family’s tradition.
FAQ
What is an easy Hanukkah craft for a 1-year-old?
A handprint dreidel or a handprint on wrapping paper is easy. The adult paints the hand and the child presses.
What paint is safe for toddlers?
Use washable, non-toxic paint made for children. For children who taste everything, try the taste-safe yogurt paint above.
How do I get a clean handprint from a toddler?
Paint a thin layer, press the hand flat, and lift it straight up. Hold the paper steady with your other hand.
How do I keep the mess small?
Use a smock, tape the paper down, and keep wet wipes and a towel nearby.
Can I do these crafts with a baby?
Yes. A parent holds the baby and gently presses the hand or foot. Use taste-safe paint and wash right away.
How long does a toddler craft session last?
Plan 10 to 15 minutes. Stop when your child loses interest.
What if my child hates getting paint on their hands?
Use a brush to paint the hand, or use a sponge. You can also place the paper over a paint-filled zip bag and press through it.
Final Thoughts
A tiny handprint is a memory you can keep. These Hanukkah crafts are simple, quick, and made for little hands. Pick two or three ideas, set out the paint, and let your toddler press and giggle. Save the finished art and add a new print next year. Happy crafting and happy Hanukkah!